
Why the veneer process matters
Many people think ceramic veneers are simply thin shells that are attached to the teeth in order to improve appearance. In reality, the result depends on a full treatment process that includes diagnosis, planning, preparation, fabrication, bonding, and maintenance.
Each stage plays an important role. A beautiful smile is not created by the material alone, but by the quality of the entire process.
Step 1. Initial consultation and examination
The first stage is a detailed consultation. During this visit, the dentist examines the teeth, gums, bite, and general oral health.
This is necessary because veneers should not be placed on unhealthy teeth or inflamed gums. If a person has caries, gum disease, heavy plaque buildup, or serious bite issues, these problems should be treated first.
At the same time, the dentist discusses the patient’s goals. Some patients want whiter teeth, while others want to improve shape, size, symmetry, or the overall balance of the smile.
Step 2. Planning the future smile
After the initial examination, the treatment plan is created. The dentist evaluates facial proportions, lip position, and the way the teeth are visible during speech and smiling.
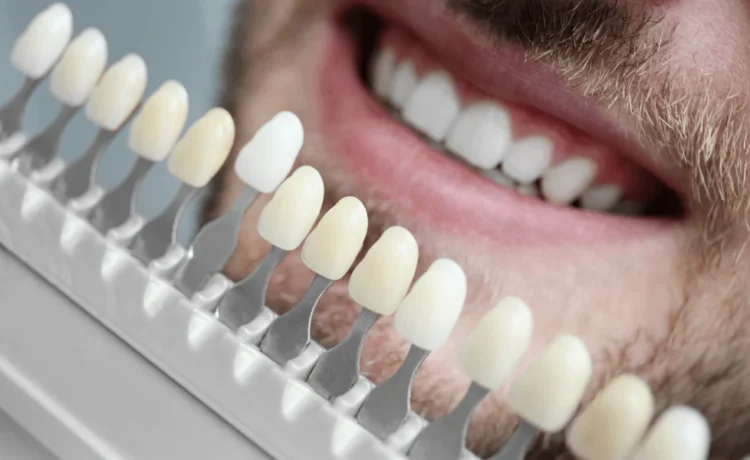
Photographs are often used at this stage because they help analyze the smile more accurately. The future shape, length, and shade of the teeth are selected based on both aesthetic goals and functional needs.
This stage is important because it turns a general idea into a precise treatment plan.
Step 3. Preliminary treatment before veneers
If any oral health problems are found, they must be treated before veneer placement. This may include caries treatment, gum therapy, or professional cleaning.
A clean and healthy mouth is necessary for successful bonding and long-term stability. It also helps the dentist choose the correct shade more accurately.
Without proper preparation, even the best ceramic veneers may not provide a predictable result.
Step 4. Mock-up and smile preview
In many cases, the patient can preview the future smile before the final veneers are made. This is done with wax models or temporary mock-ups.
This stage gives the patient a chance to see how the new smile may look in real life. It also allows the dentist to assess shape, size, proportions, and harmony with the face.
If any adjustments are needed, they can be made before the final restorations are produced.
Step 5. Tooth preparation
Once the design is approved, the teeth are prepared. In many cases, a small amount of enamel is removed from the front surface.
The purpose of this step is to create enough space for the veneers so they look natural and do not appear thick or artificial. The amount of enamel removed depends on the clinical case.
Preparation is usually conservative, but it should always be based on proper planning rather than assumptions.
Step 6. Impressions or digital scans
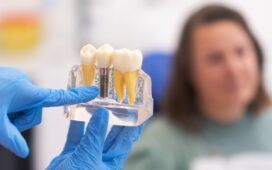
After preparation, the dentist takes impressions or digital scans of the teeth. These records are used to create the ceramic veneers with a high level of precision.
At this stage, temporary restorations may be placed if needed. They protect the prepared teeth and help maintain comfort and appearance while the permanent veneers are being made.
Step 7. Fabrication of ceramic veneers
The veneers are then produced using the chosen method. Some are layered by hand, while others are pressed or milled with digital technology.
The purpose is not only to create the right shape, but also to reproduce natural enamel characteristics such as light reflection, translucency, and subtle surface texture.
A well-made veneer should fit accurately and look natural in different lighting conditions.
Step 8. Try-in and bonding
When the veneers are ready, the patient returns to the clinic for fitting. The dentist checks the shape, color, margins, and overall appearance.
If everything looks correct, the veneers are bonded to the teeth using a special dental cement. This step is extremely important because it provides strong adhesion and stability.
After fixation, the veneers become part of the visible tooth surface and function together with the natural tooth structure.
Step 9. Adaptation after placement
Most patients adapt to ceramic veneers quickly. They usually feel smooth and comfortable, and speech returns to normal in a short time.
However, the patient still needs to be careful with hard foods and damaging habits. Biting ice, cracking nuts, or opening packages with teeth can damage restorations.
People who grind their teeth may also need additional protection, such as a night guard.
Step 10. Long-term care and maintenance
Ceramic veneers require regular but simple care. Teeth should be brushed twice a day with a soft toothbrush and non-abrasive toothpaste. Flossing is also necessary.
Routine dental checkups and professional cleanings help monitor both the veneers and the surrounding tissues. Although ceramic is resistant to staining, maintaining good hygiene is still essential.
The long-term success of veneers depends not only on the material, but also on daily care and regular follow-up.
When veneers may not be appropriate
Ceramic veneers are not suitable in every case. Patients with severe gum disease, advanced tooth destruction, or major bite problems may need different treatment first.
Sometimes crowns, orthodontics, or restorative procedures are more appropriate. This is why the diagnostic stage should never be skipped.
Conclusion
The ceramic veneer process includes much more than simply placing thin shells on the teeth. It is a structured treatment that begins with diagnosis and continues through planning, preparation, fabrication, bonding, and maintenance.
When each stage is performed carefully, ceramic veneers can provide a natural-looking, durable, and comfortable improvement in smile aesthetics.


